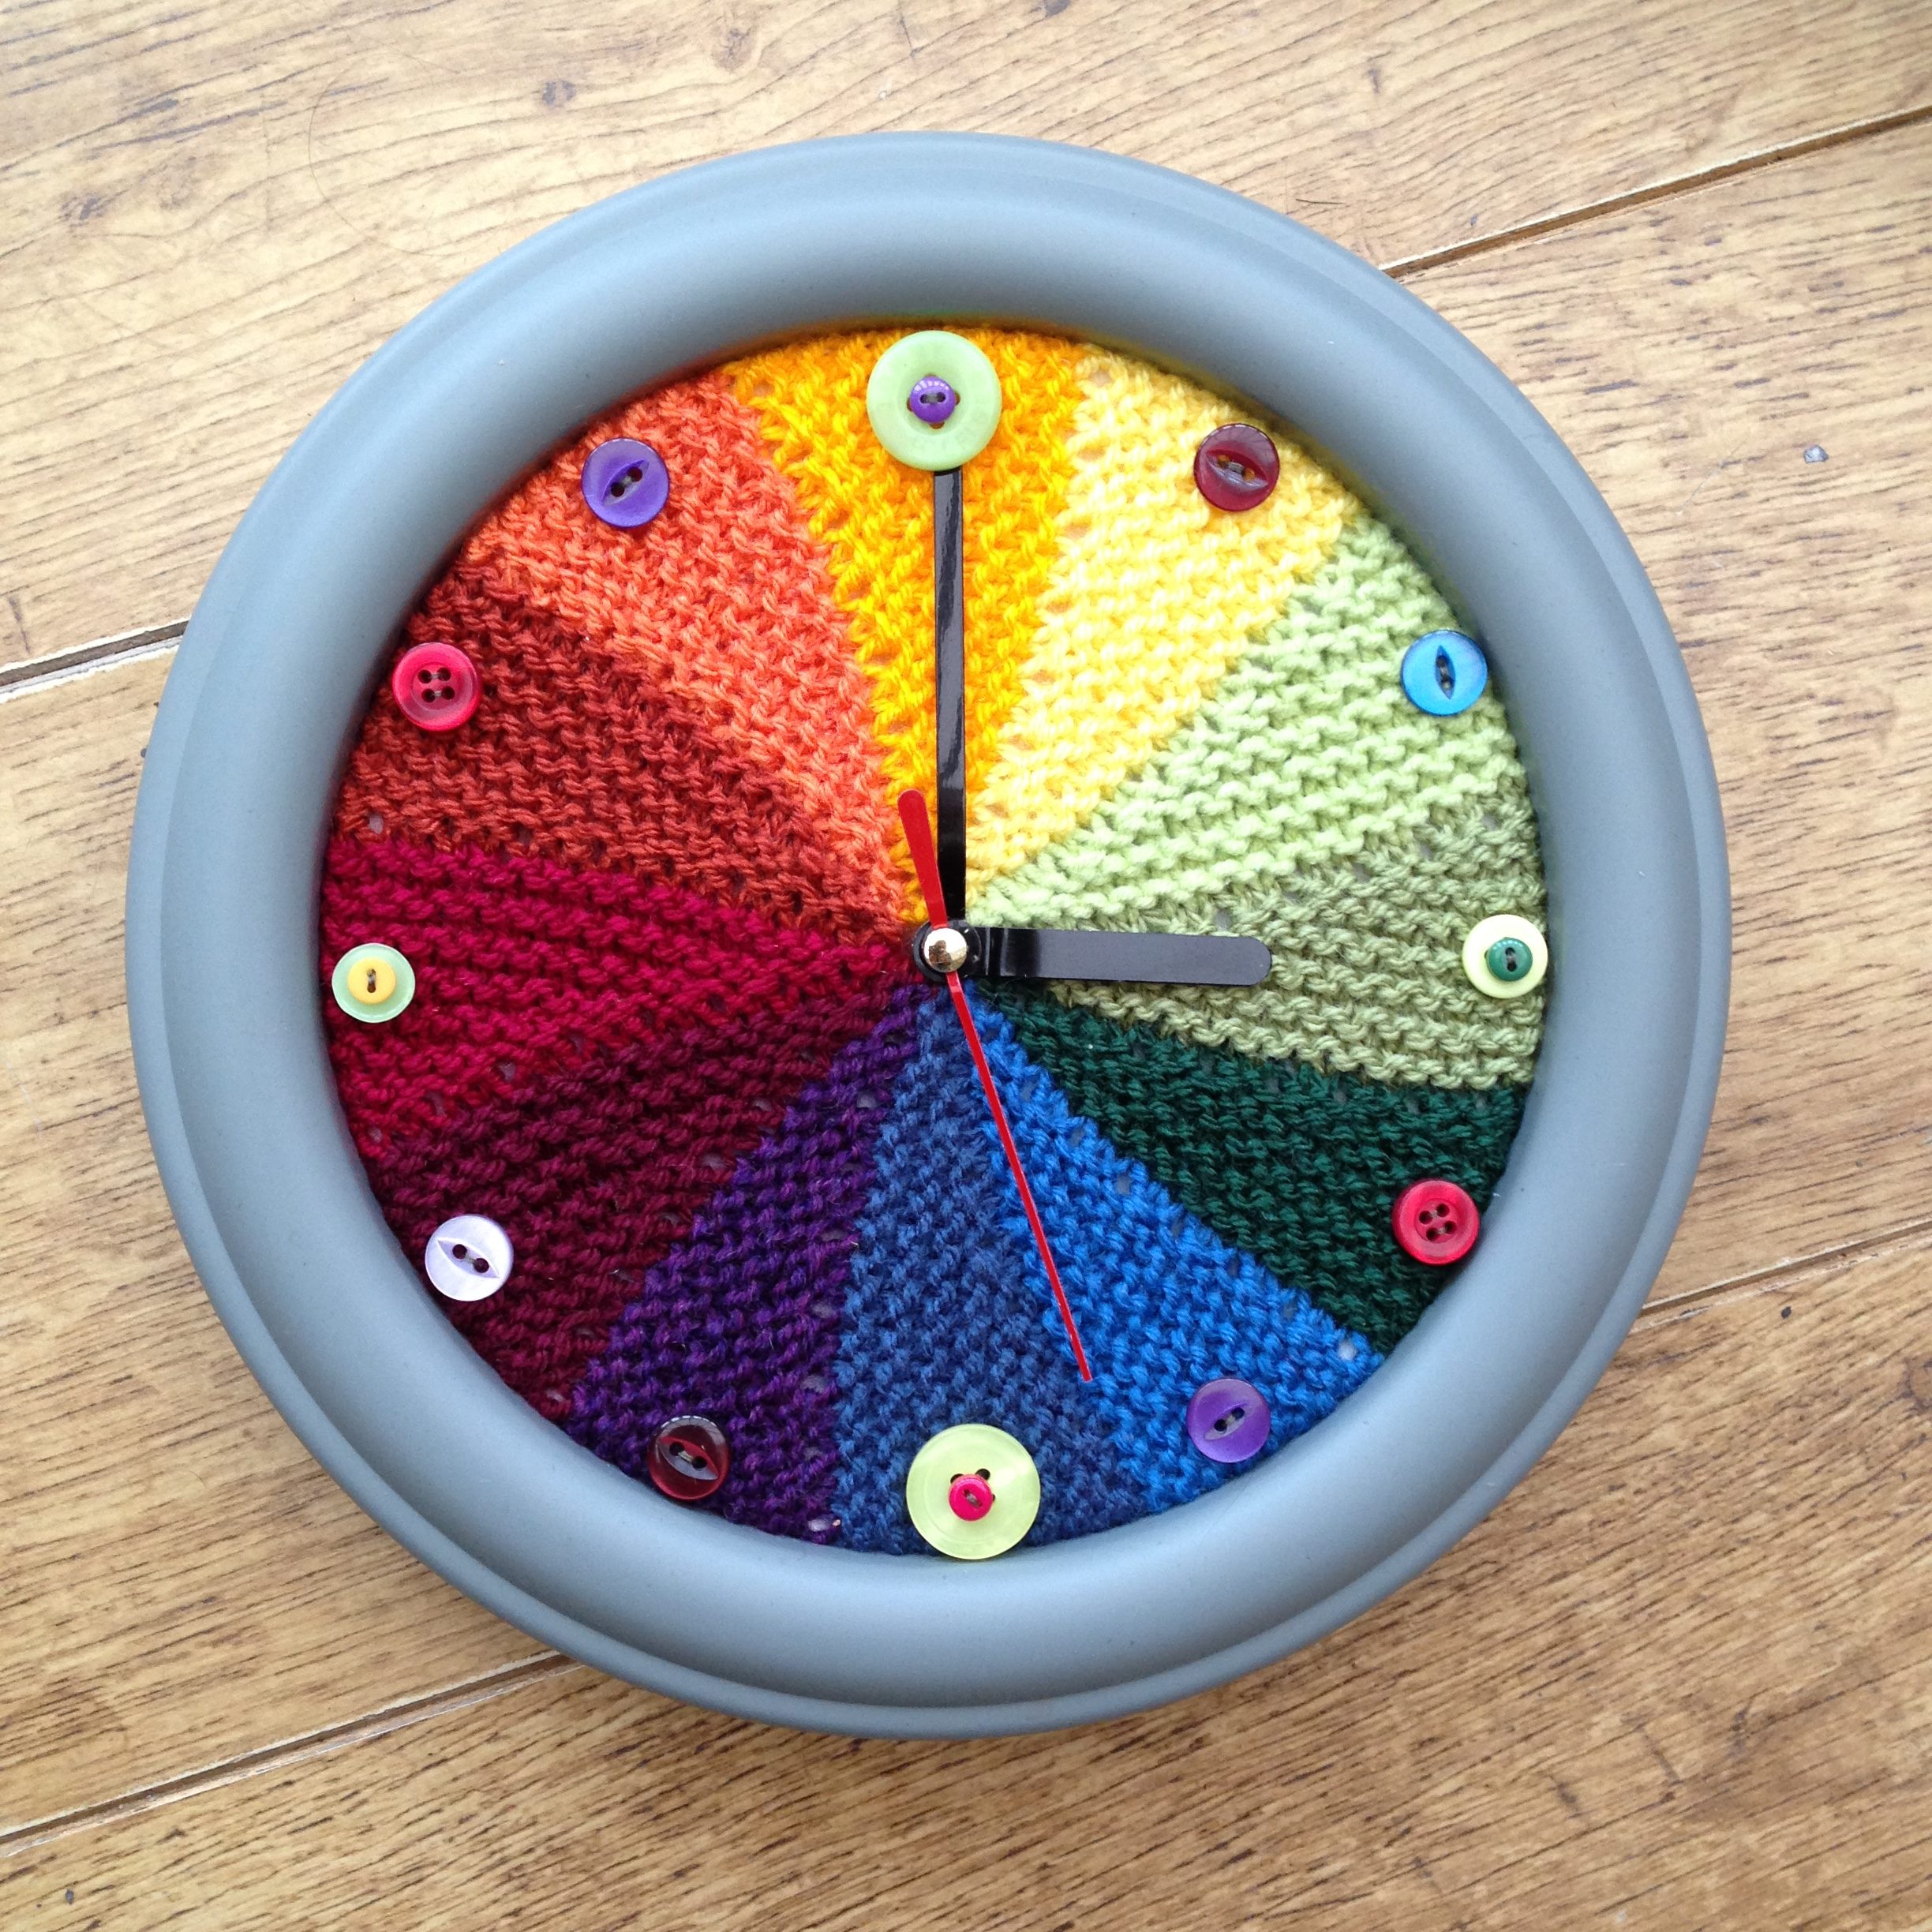
Whilst perusing Poundstretcher the other day I spotted a cheap and cheerful clock. Thinking perhaps that I could “bling” it up a bit I made my rash purchase (£1.99!) and headed home to rummage for inspiration amongst “The Stash”. This is the end result, a Rainbow Colour Wheel Clock. I’m sure you guys will come up with your own colour schemes but maybe this will help to get you started 😊
Materials
You’ll need:
One Clock – mine had a face with a diameter of 6.5 inches / 16.5 centimetres
One pair of 3.5 mm knitting needles
Oddments of double knitting weight yarn (I used 12 different colours)
Some brightly coloured buttons for your “numbers”
A chunky sewing needle.
Method
Cast on 20 stitches (my clock face had a diameter of 6.5”/16.5cm so you may need to adjust your number of stitches accordingly)
Row 1 – knit
Row 2 – knit 18, turn
Row 3 and each alternate row (up to and including row 17) – slip first stitch, knit to end
Row 4 – knit 16, turn
Row 6 – knit 14, turn
Row 8 – knit 12, turn
Row 10 – knit 10, turn
Row 12 – knit 8, turn
Row 14 – knit 6, turn
Row 16 – knit 4, turn
Row 18 – knit 2, change to next colour and repeat from row 1.
Continue to do this until you have 12 segments then cast off.
Stitch the cast on and cast off segments together to join the circle but make sure you leave a hole in the centre for the pointers.
Cut a piece of cardboard the same diameter as your clock face.
Thread up your sewing needle with some extra yarn and using a running stitch catch the loop of each end stitch around the circle, don’t fasten off, just leave the end loose.
Make a hole in the centre of your card then place it on the wrong side of your knitted circle. Pull the running stitches tight so that the card is now secured then fasten off.
Stitch your buttons in the centre of each colour segment close to the edge of the circle.
Remove the clear cover from the face of your clock. Pull the pin from the centre of the pointers so that you can remove them. Push your card circle into the clock then replace the pointers. You may need to trim or bend the pointers up so that they clear the buttons and don’t become snagged in the knitted fabric. Once you’re happy that they are spinning properly, replace the clear cover and enjoy!
Don’t forget to share your photos, we’d love to see them 😊